


If you are setting up a FiveM server, or installing a resource that needs a database and web server, one of the easiest ways to get started is with XAMPP.
XAMPP is a simple all-in-one package that lets you run Apache and MySQL on your own PC without needing to set everything up manually. For many FiveM scripts, MDTs, CADs, and other web-based resources, this can be a quick way to get the required services running.
In this guide, we will show you how to install XAMPP, start Apache and MySQL, and make sure everything is working properly for your FiveM setup.
You can download XAMPP here:
XAMPP Download:
https://www.apachefriends.org/download.html
Step 1: Download XAMPP
Go to the official XAMPP website and download the latest Windows version.
Once the file has downloaded, run the installer.

Step 2: Install XAMPP
Open the installer and follow the setup steps.
For most users, the default settings are completely fine. You do not need to change much unless you have a specific reason to do so.
During installation:
- Click through the setup wizard
- Choose your install location
- Allow any Windows Firewall prompts if they appear
Once the install is complete, open the XAMPP Control Panel.
Step 3: Open the XAMPP Control Panel
After installing XAMPP, launch the control panel.
You will see a list of modules, including:
- Apache
- MySQL
- FileZilla
- Mercury
- Tomcat
For most FiveM-related setups, the main ones you need are:
- Apache
- MySQL
These are the two services you will want to start.
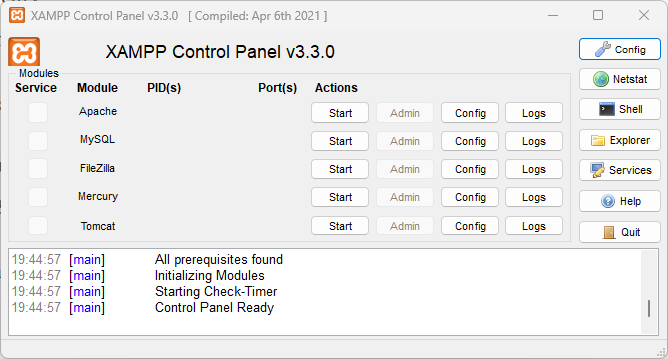
Step 4: Start Apache and MySQL
Inside the XAMPP Control Panel, click Start next to:
- Apache
- MySQL
If they start successfully, both rows should highlight and show that they are running.
That means your local web server and database server are now active.

You should be good to go!
Make sure that XAMPP is always open, with mysql and apache running whenever your server is being started, and is running.
It will not auto start when you open your pc, and it can sometimes randomly quit.