
How to Access and Manage Your HTNetwork VPS
16 April 2026
This guide explains how to access your HTNetwork VPS control panel, manage your VPS, view usage statistics, connect using RDP, and use the included tools such as DDoS protection, backups, logs, and settings.
Step 1: Log in to the HTNetwork Client Area
First, open your web browser and go to the HTNetwork website.
Log in to your HTNetwork account using the email address and password linked to your account.
Once logged in, you will be taken to your client area dashboard.
Step 2: Select Your VPS Service
Inside the HTNetwork client area, go to:
My Products & Services
Find the VPS service you want to access.
Click on the VPS service to open the product details page.
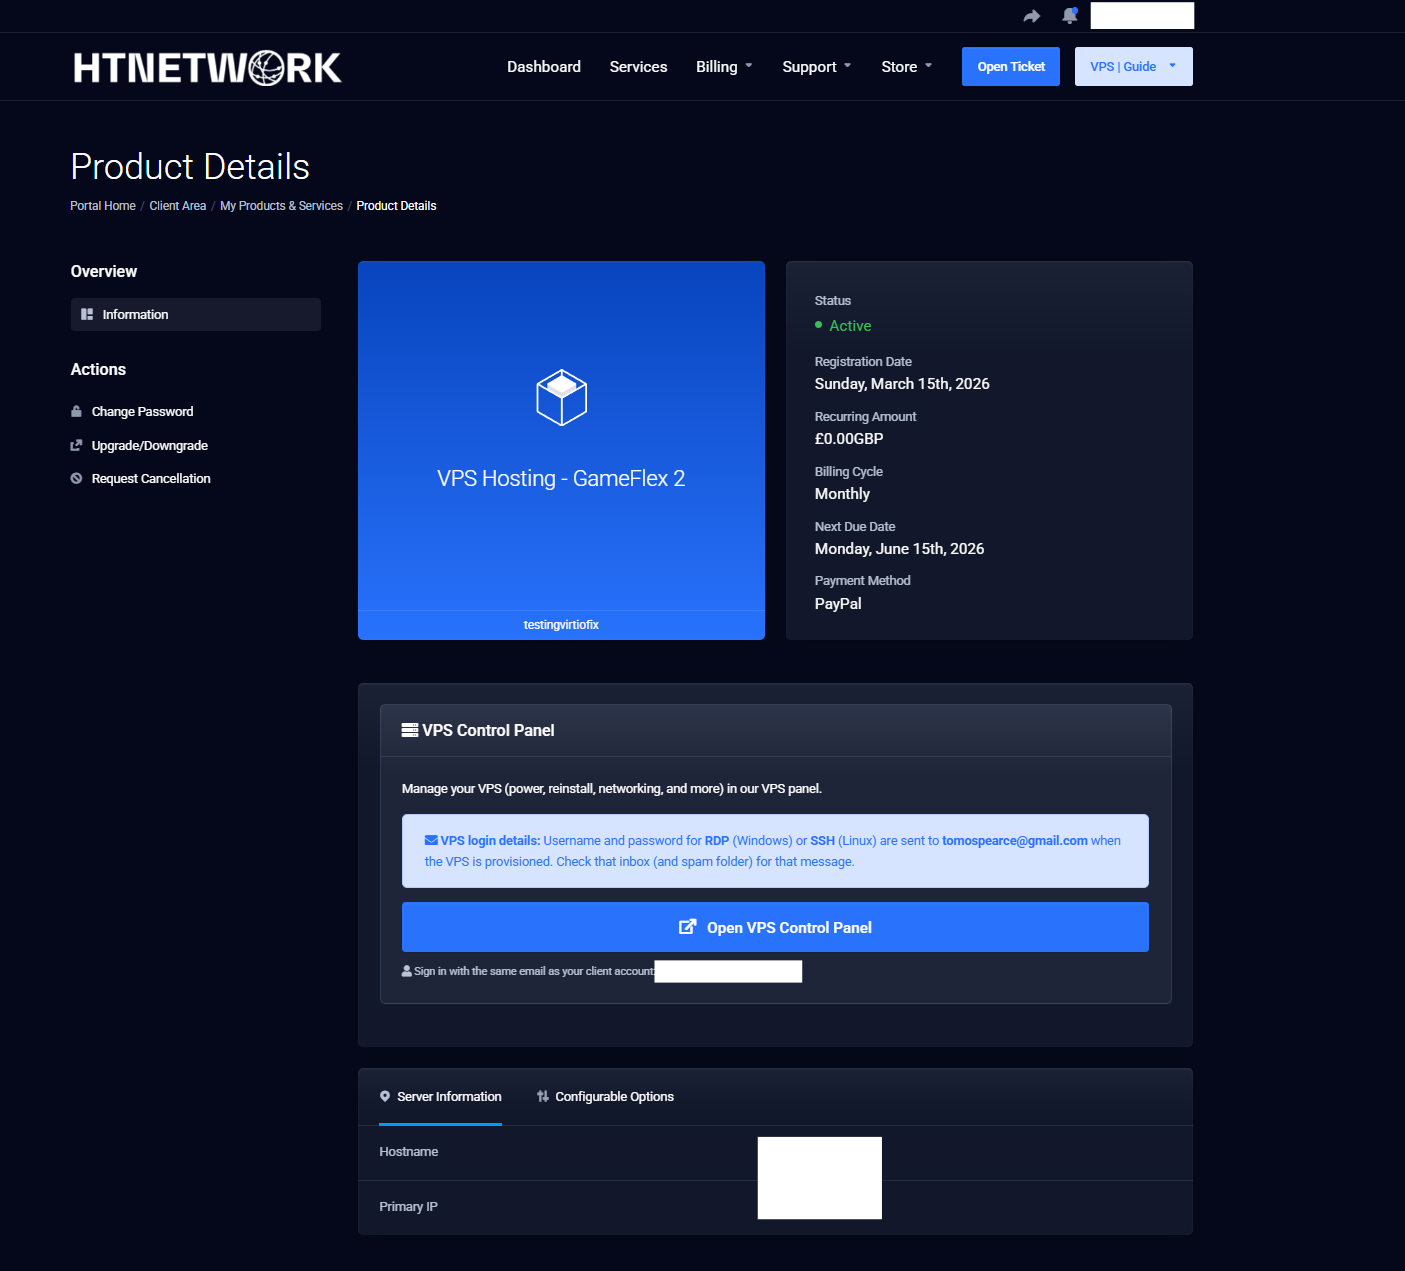
Step 3: Open the Information Tab
Once you are on your VPS service page, open the:
Information
tab.
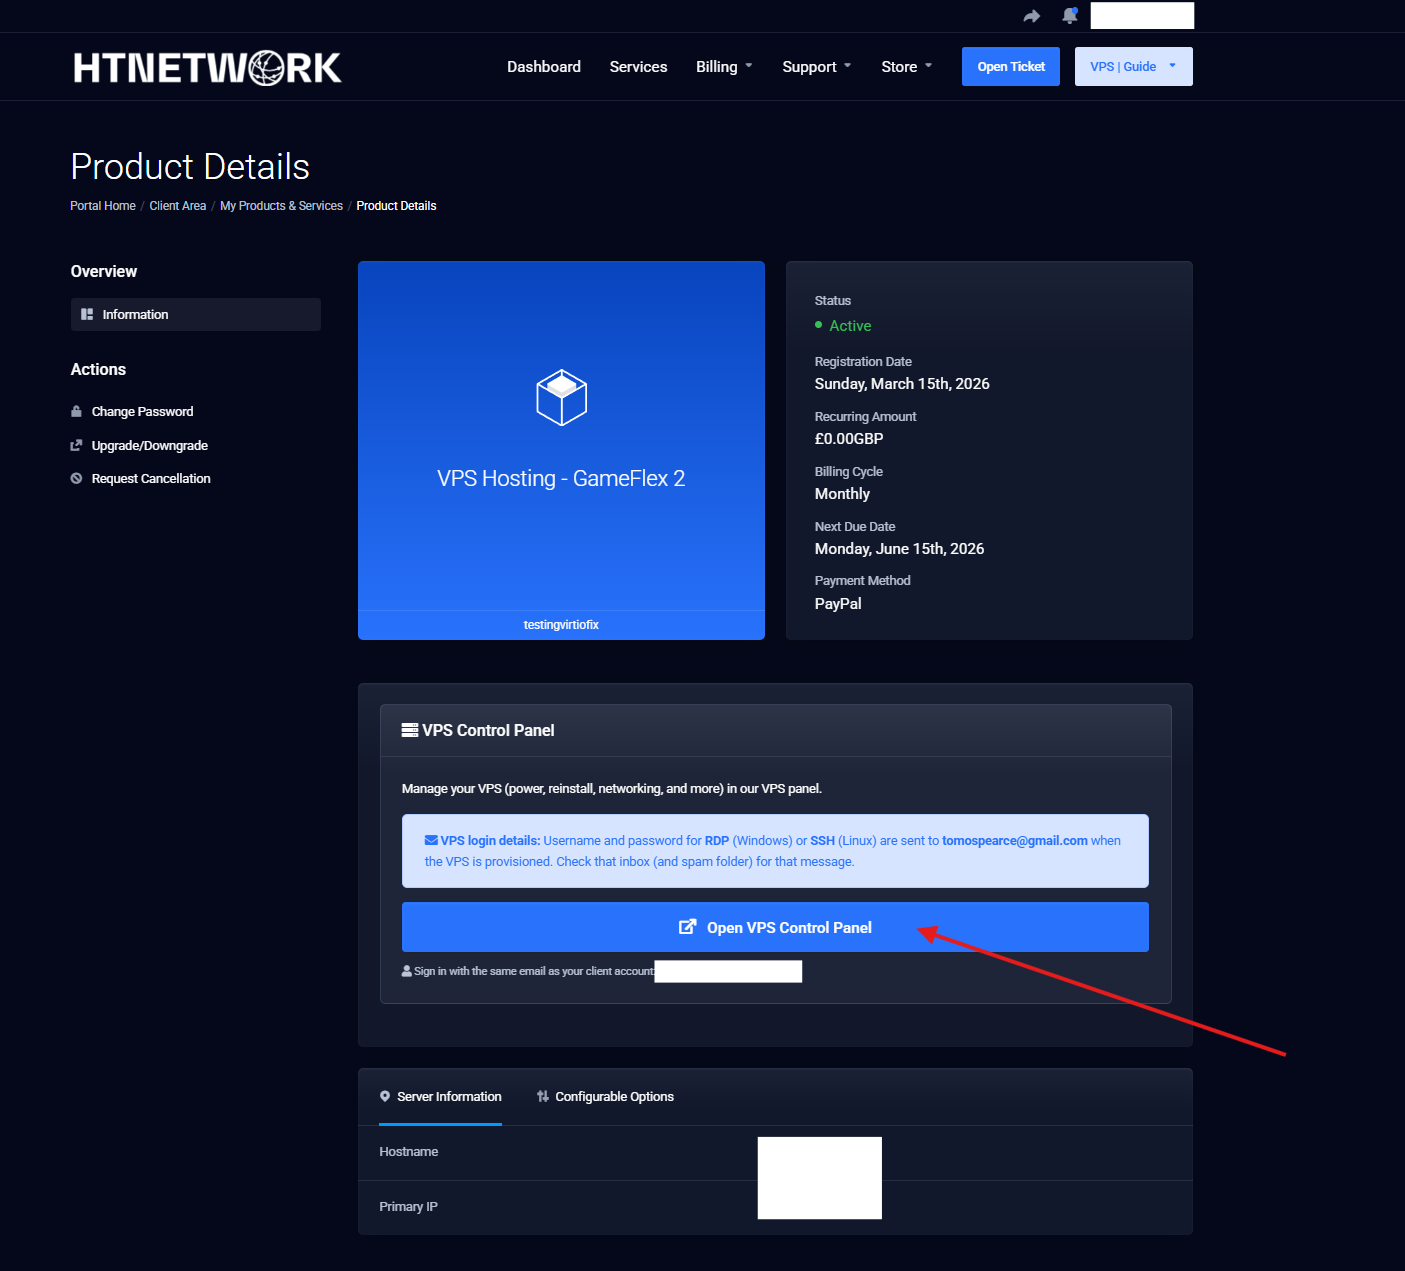
Inside this tab, click:
Open VPS Control Panel
This will redirect you to the VPS control panel.
Step 4: Log in to the VPS Control Panel
After opening the VPS control panel, you may be asked to log in again.
Use your HTNetwork account details to sign in.
Once logged in, you will be taken to the dashboard showing your VPS services.
From this dashboard, you can quickly perform basic VPS actions such as:
- Stop your VPS
- Start your VPS
- Restart your VPS
- View your available VPS services
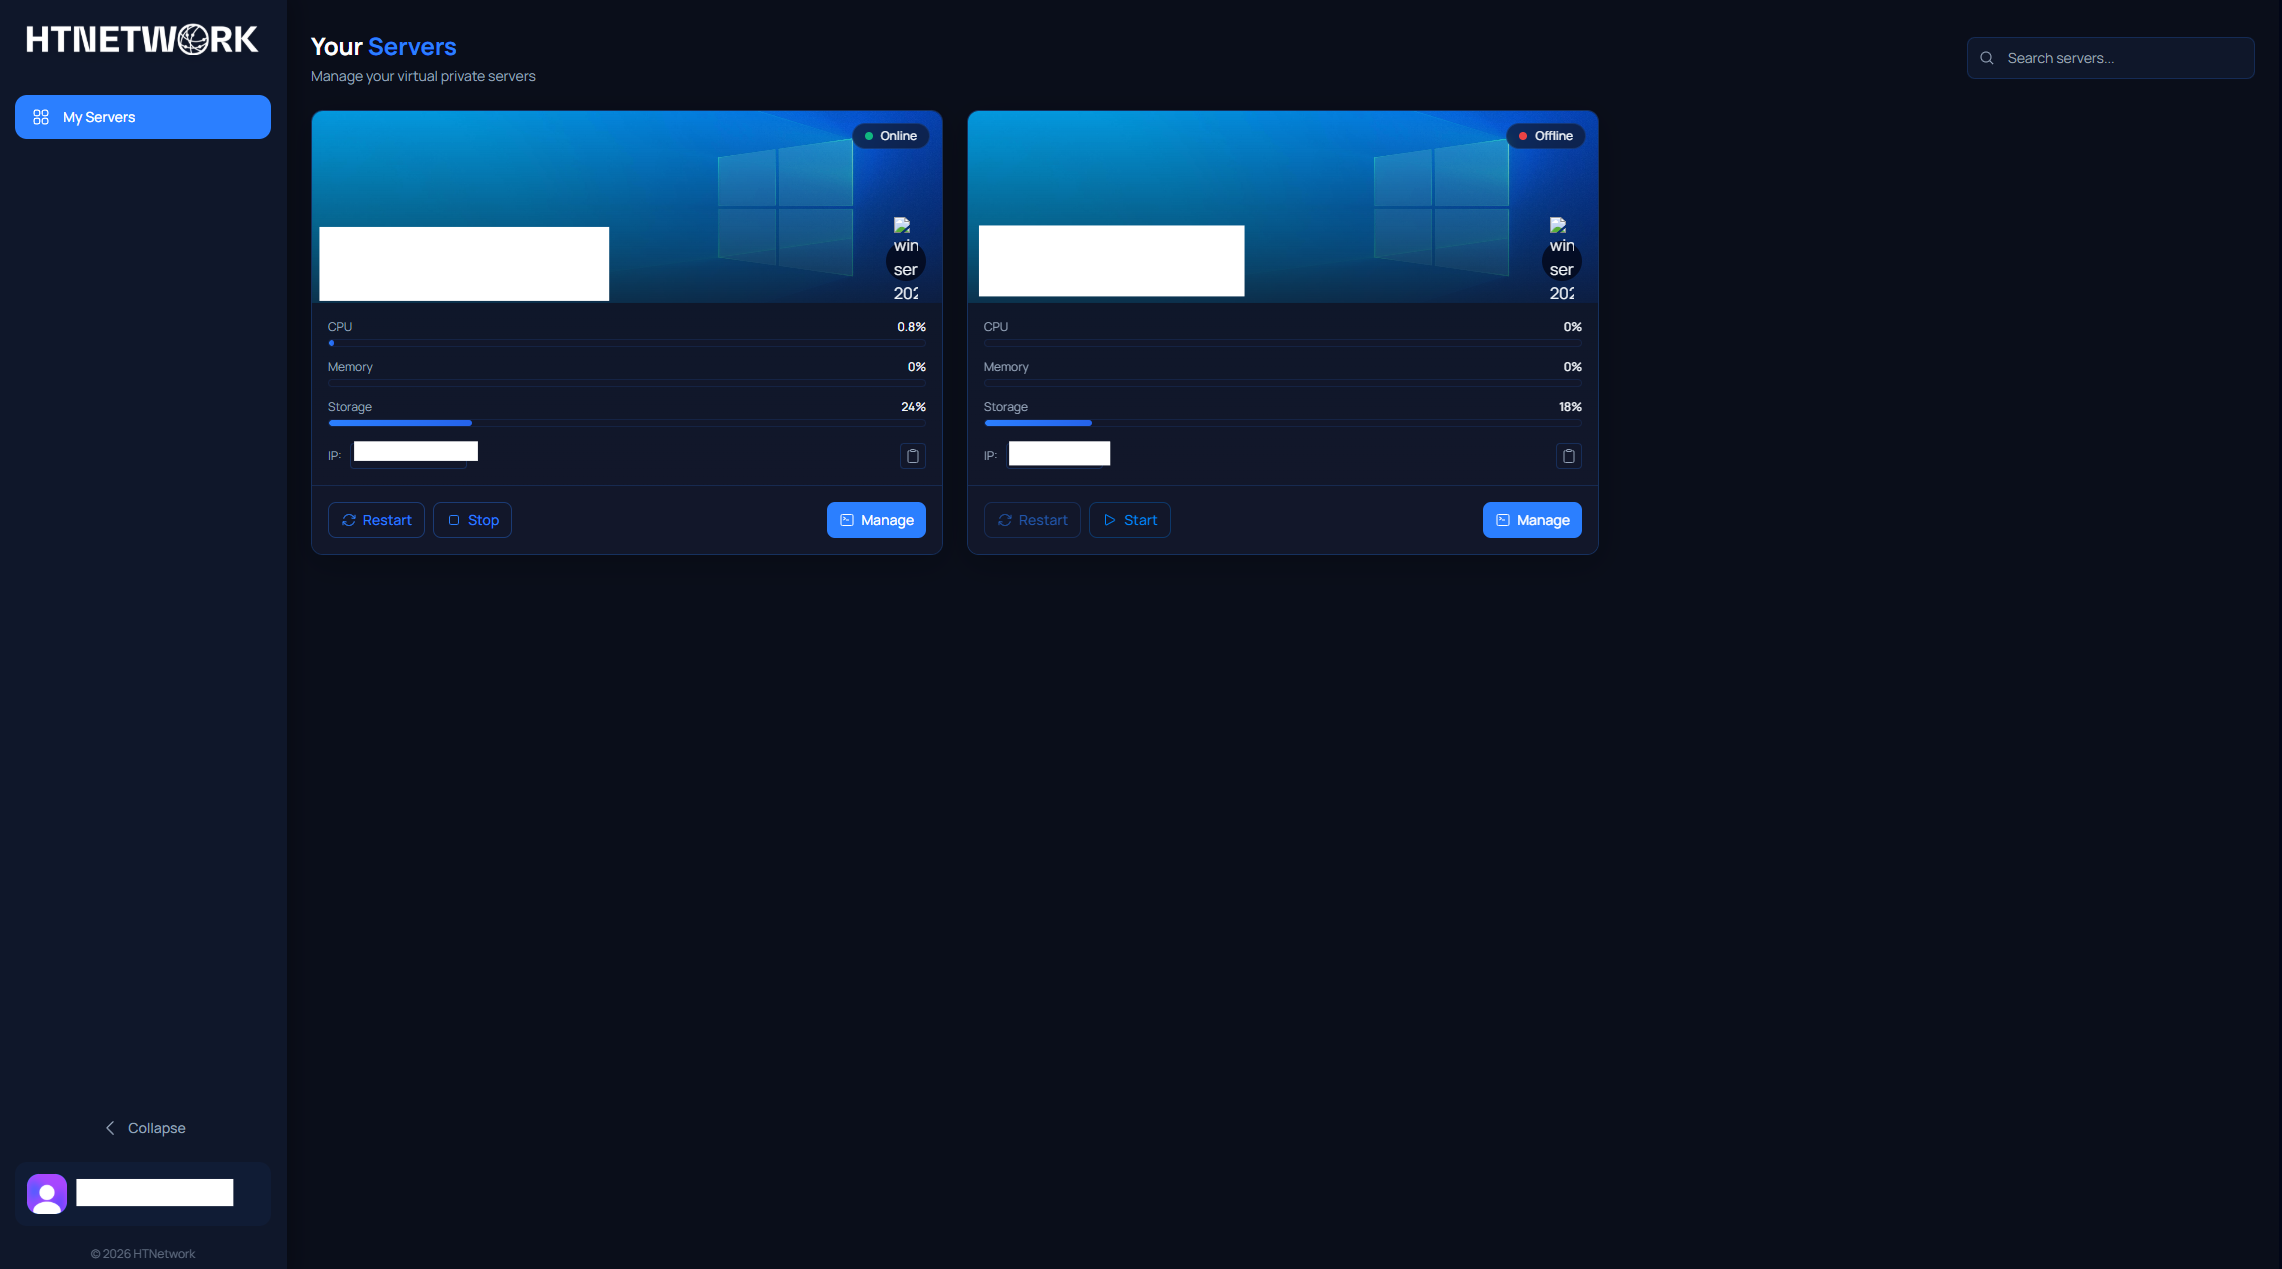
Step 5: Open Your VPS Dashboard
On the VPS control panel dashboard, find the VPS you want to manage.
Click:
Manage
This will open your VPS dashboard, also known as your VPS Console.
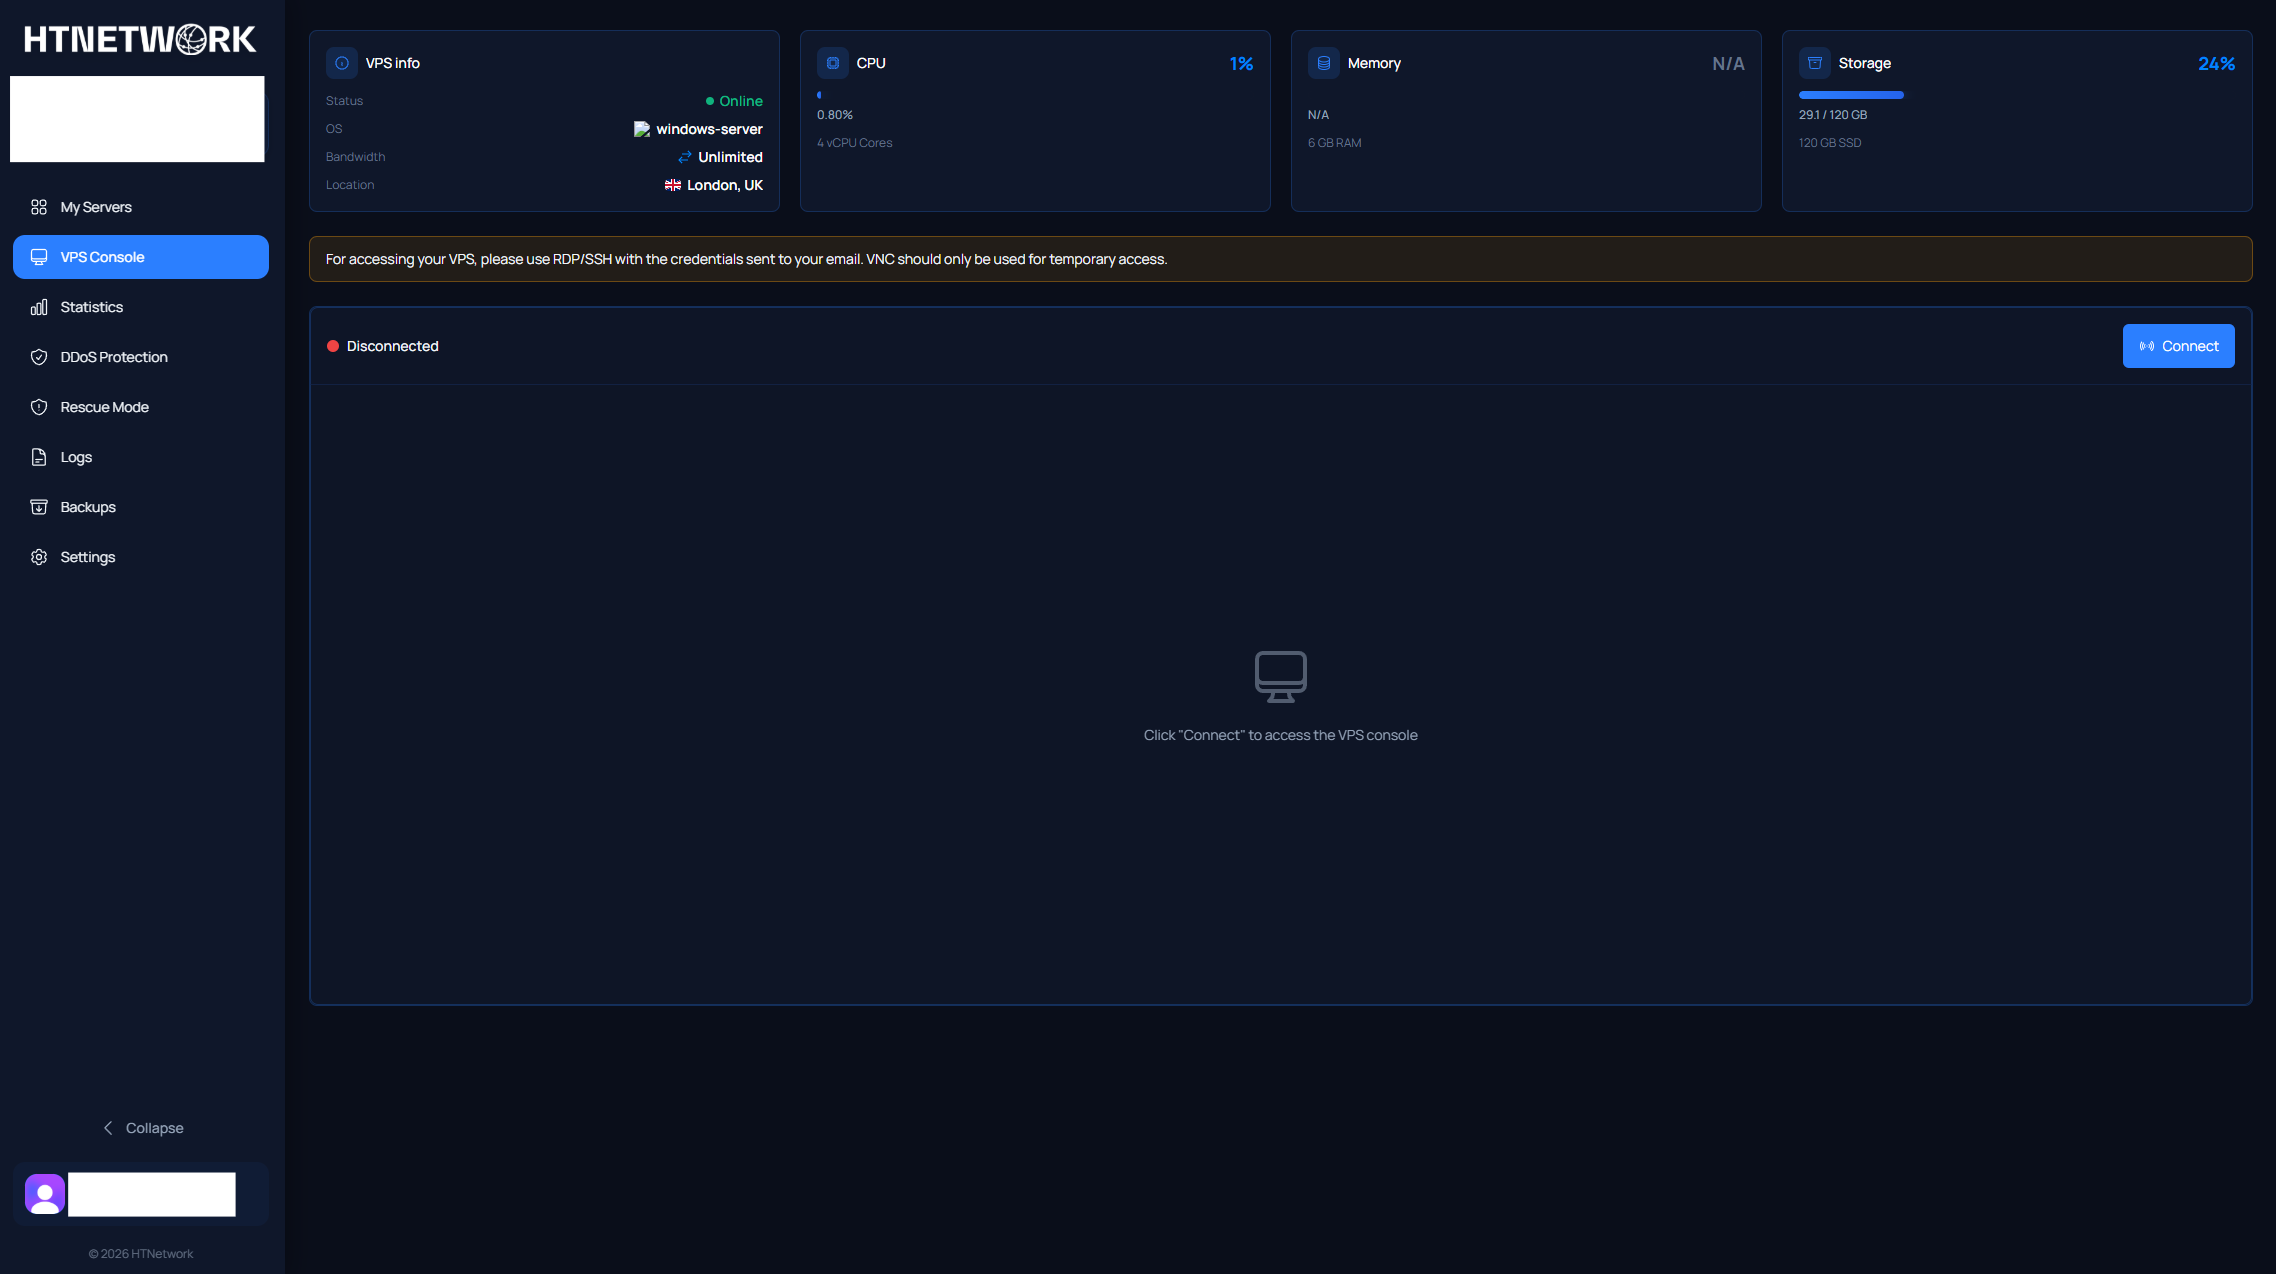
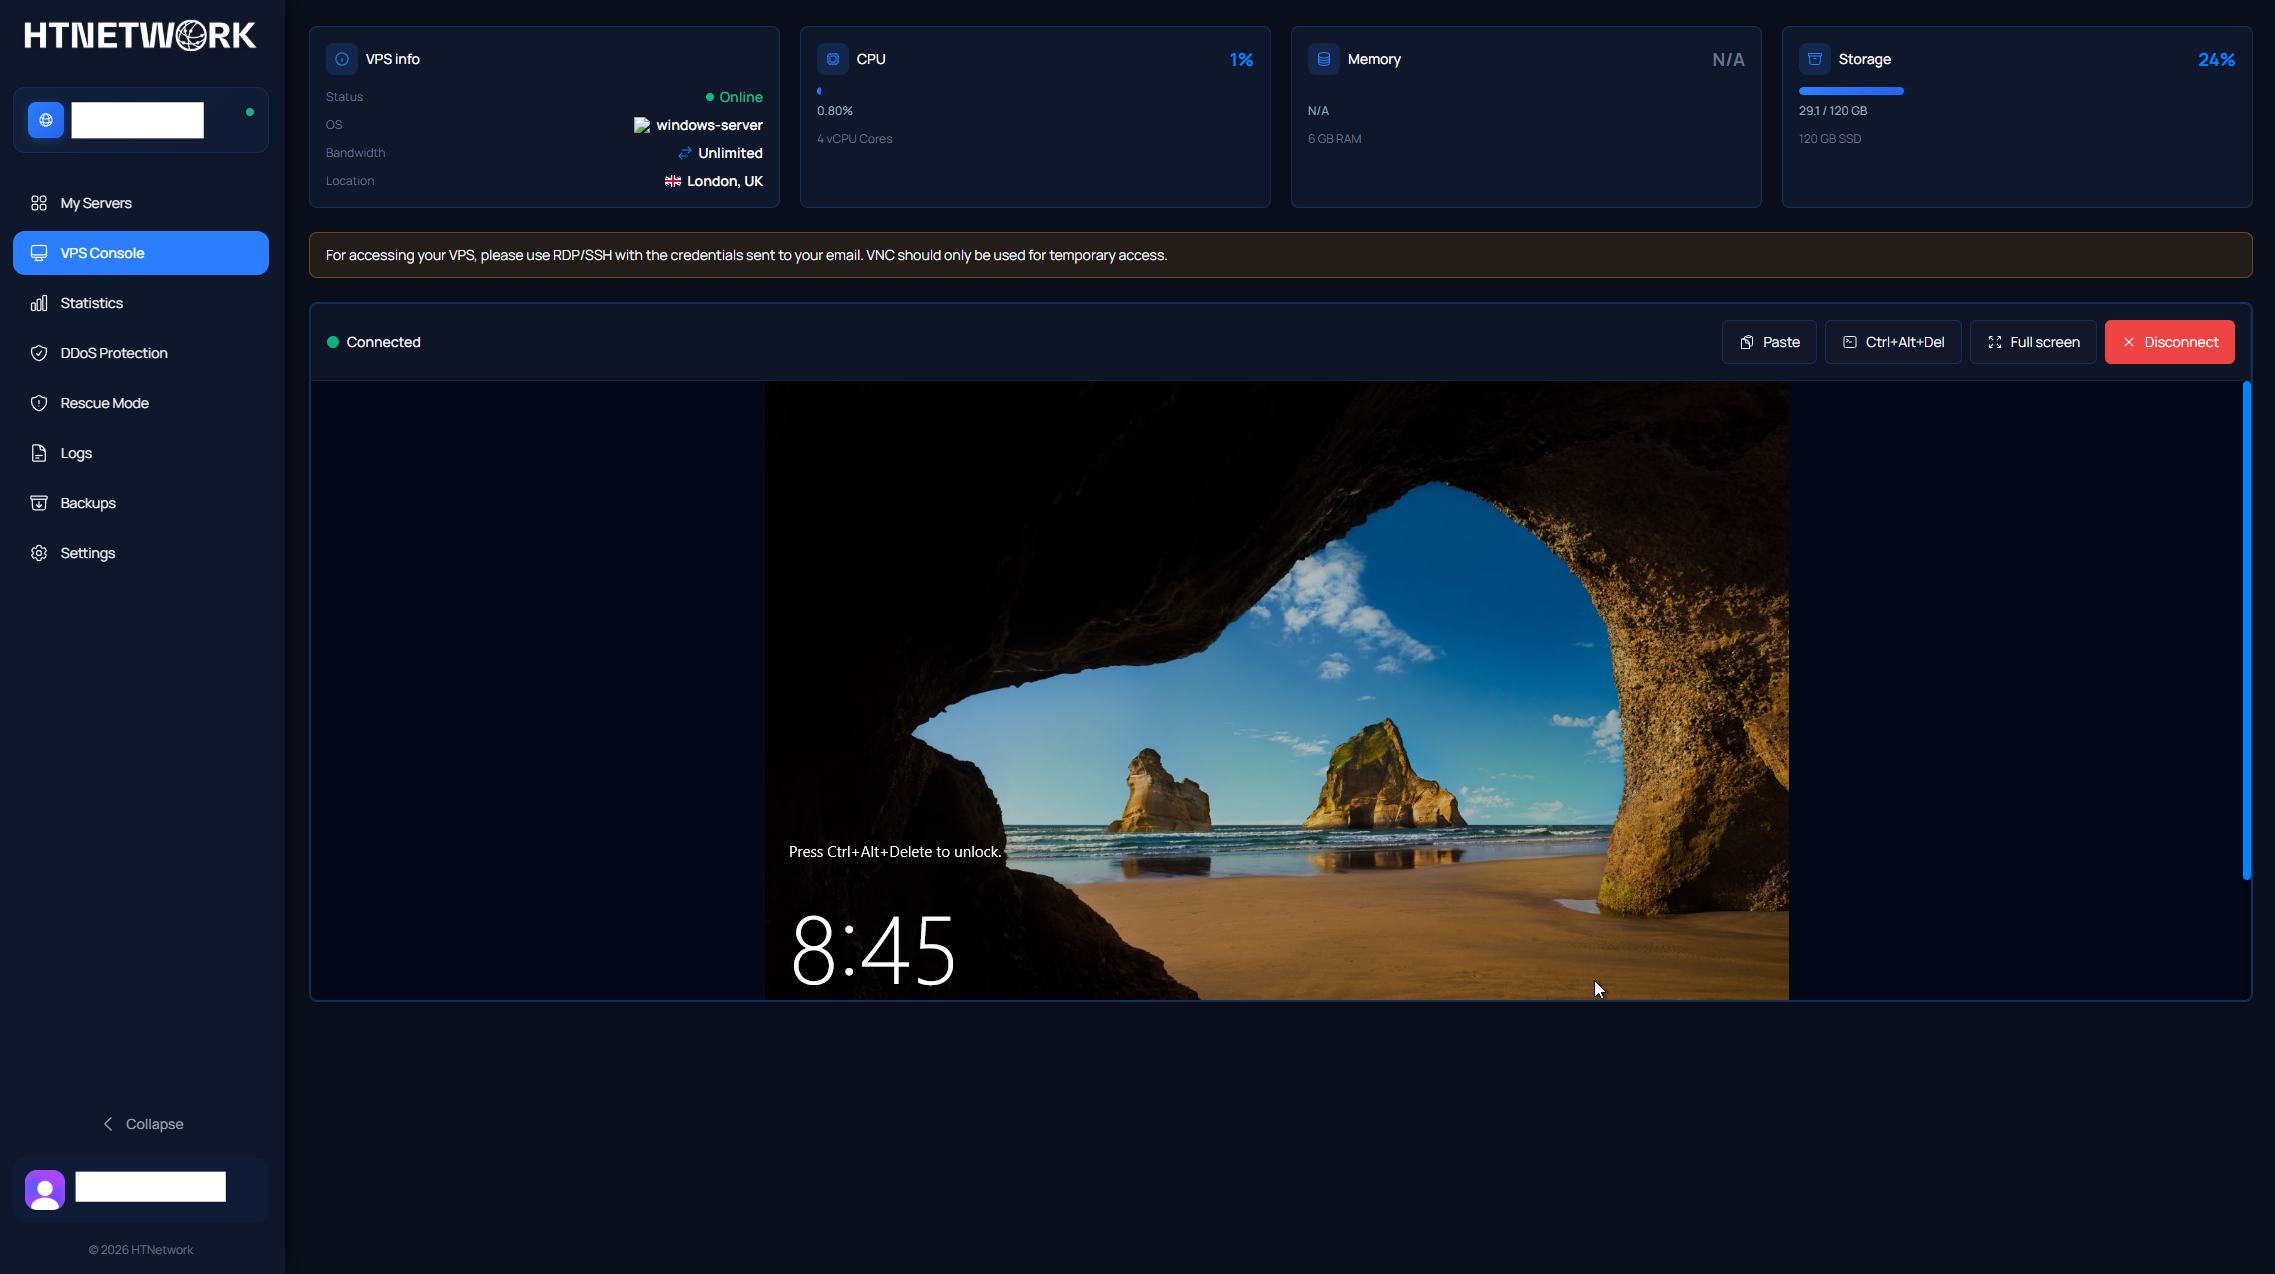
Step 6: View Your VPS Console
Your VPS Console is where you can view and manage the main details of your VPS.
Here you can see information such as:
- VPS status
- Server IP address
- CPU usage
- CPU specifications
- Memory usage
- Storage usage
- Operating system details
- General VPS information
This section gives you a quick overview of your VPS and its current resource usage.
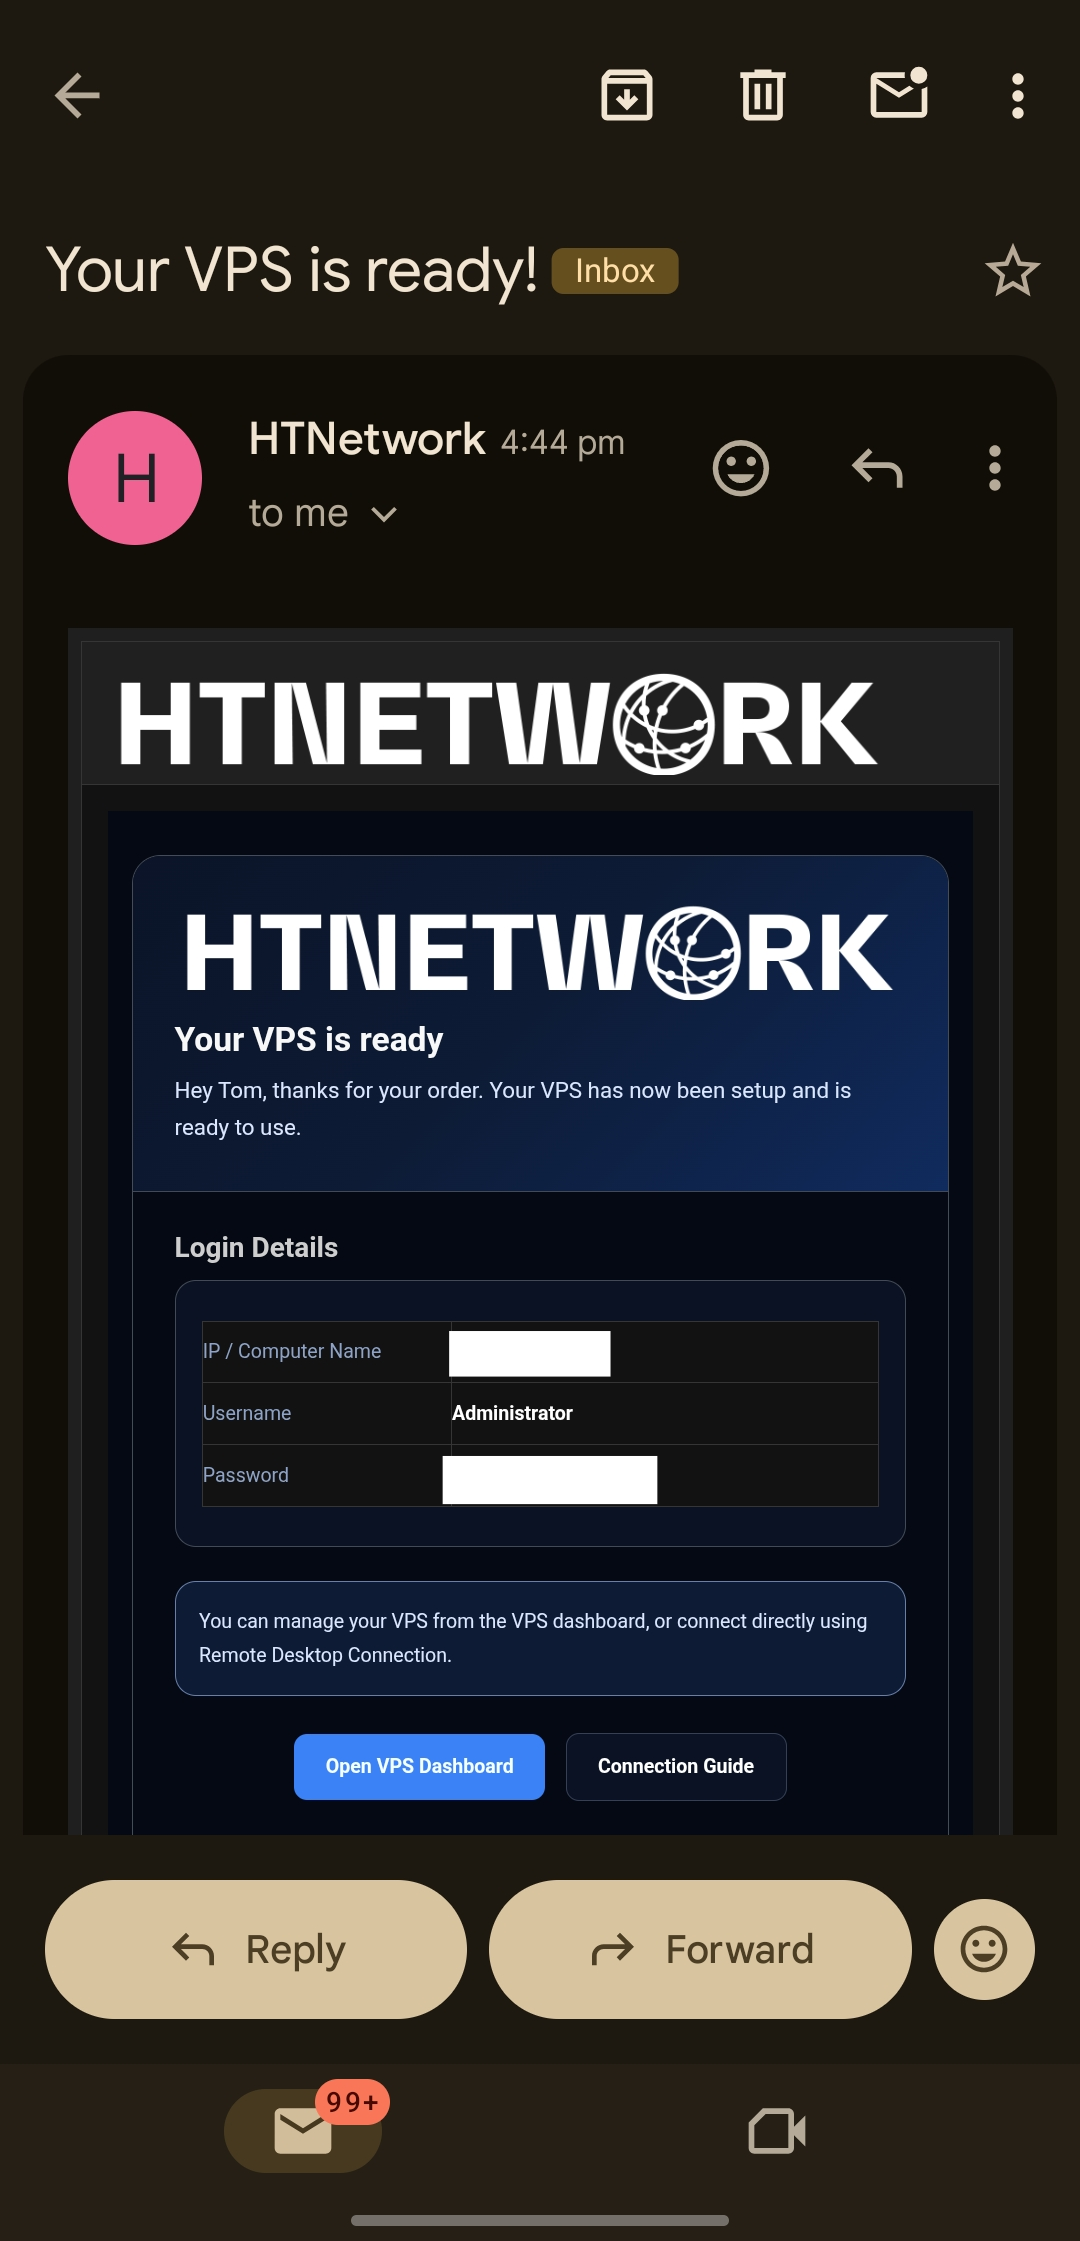
Finding Your VPS Login Information
Your VPS login information is not shown inside the VPS control panel.
Your VPS login details are sent to you by email when you order your VPS.
This email includes the information you need to connect, such as:
- VPS IP address
- Username
- Password
Your username is usually:
Administrator
If you cannot find your VPS login email, please check your spam or junk folder.
The email is sent automatically when your VPS is set up, so it should have been sent to the email address linked to your HTNetwork account.
If you still cannot find the email, please contact HTNetwork support and we can help you recover your VPS login information.
Connecting to Your VPS
Inside the VPS Console, you may see an option called:
Connect
This uses something called VNC.
VNC allows you to access your VPS directly through your browser, but it should only be used for temporary troubleshooting.
Important: Do Not Use VNC for Normal Access
You should not use VNC as your main way to connect to your VPS.
VNC is only intended for temporary access, usually for troubleshooting issues where RDP is not working.
VNC may constantly disconnect you and is not designed for long sessions or normal server management.
For normal VPS access, you should always use RDP.
How to Connect to Your VPS Using RDP
RDP stands for Remote Desktop Protocol. This is the recommended way to access and manage your Windows VPS.
You will need your VPS login details from the email sent when you ordered your VPS.
These details usually include:
- VPS IP address
- Username
- Password
Your username is usually:
Administrator
Your password is the VPS password included in your VPS login email, unless you have changed it later in your VPS settings.
RDP Video Guide
We recommend following our video guide first:
RDP Video Guide:
The written steps below are alternative instructions if you prefer to follow the guide in text form.
Connecting with RDP on Windows
- Open the Windows search bar.
- Search for Remote Desktop Connection.
- Open the Remote Desktop Connection app.
- In the Computer field, enter your VPS IP address.
- Click Connect.
- When the login window appears, click More choices.
- Click Use a different account.
- In the username field, enter:
Administrator
- In the password field, enter your VPS password from your VPS login email.
- Click OK or Connect.
- If a certificate warning appears, click Yes to continue.
You should now be connected to your VPS desktop.
Important RDP Login Notes
Make sure you are not trying to log in using your personal Windows account or Microsoft account.
You need to click:
More choices
Then click:
Use a different account
Then manually enter:
Administrator
After that, enter your VPS password from your VPS login email.
If you do not select Use a different account, Windows may try to sign in using your own PC account, which will not work for your VPS.
Connecting with RDP on Mac
If you are using a Mac:
- Download Microsoft Remote Desktop from the App Store.
- Open Microsoft Remote Desktop.
- Click Add PC.
- Enter your VPS IP address.
- Add the username:
Administrator
- Enter your VPS password when prompted.
- Save and connect.
You should now be connected to your VPS.
VPS Statistics
On the left-hand side of the VPS Console, under:
VPS Console
You can view your VPS statistics.
This section gives you more detailed information about your VPS usage and performance.
Here you can view details such as:
- CPU usage
- Memory usage
- Disk usage
- Network usage
- VPS performance data
This is useful if you want to check how much of your VPS resources are being used.
DDoS Protection
Below the statistics section, you will see:
DDoS Protection
This is where you can manage the included DDoS protection for your HTNetwork VPS.
From this section, you can manage your VPS protection settings and configure the protection available with your service.
For a full walkthrough, please use our DDoS protection guide:
DDoS Protection Guide:
[Insert DDoS protection guide link here]
Rescue Mode
Below DDoS Protection, you will see:
Rescue Mode
Do not touch Rescue Mode unless you already know what you are doing.
Rescue Mode is intended for advanced troubleshooting and recovery. Using it incorrectly may stop your VPS from booting normally or make it harder to access your server.
If you are unsure, contact support before using this option.
Logs
The Logs section lets you view actions that have been taken on your VPS.
This can include actions such as:
- Starting the VPS
- Stopping the VPS
- Restarting the VPS
- Password changes
- Other control panel actions
This is useful if you want to check what has happened on your VPS or confirm when an action was performed.
Backups
The Backups section allows you to make use of HTNetwork’s included backup feature.
Here you can manage flash backups for your VPS.
Depending on your service, you may be able to:
- Create backups
- Restore backups
- Download backups
- Recover your VPS if something goes wrong
Backups are useful if you are making major changes to your VPS, installing new software, or editing important server files.
Before making big changes, it is always a good idea to create a backup first.
Settings
The Settings section allows you to update certain VPS settings.
Here you can change things such as:
- Hostname
- VPS password
Changing Your VPS Password
If you change your VPS password in the settings section, you must fully stop and start your VPS for the password change to take effect.
A normal restart is not enough.
You need to:
- Stop the VPS.
- Wait for it to fully stop.
- Start the VPS again.
After the VPS has been stopped and started, your new password should work when connecting through RDP.
Summary
To access and manage your HTNetwork VPS:
- Log in to the HTNetwork client area.
- Open My Products & Services.
- Select your VPS.
- Go to the Information tab.
- Click Open VPS Control Panel.
- Log in again using your HTNetwork account.
- Find your VPS and click Manage.
- Use the VPS Console to view your VPS details, stats, backups, logs, DDoS protection, and settings.
- Find your VPS login details in the email sent when you ordered your VPS.
- Use RDP for normal VPS access.
- Only use VNC for temporary troubleshooting.
For normal day-to-day VPS access, always use RDP. VNC should only be used if you need temporary access for troubleshooting.